![[CT14 Garage] – DIY: Taycan Battery Module Replacement](http://shop.ct14garage.com/cdn/shop/articles/image-11.png?v=1732398734&width=1100)
Today I wanna share with everyone how we repaired a Taycan with the so popular “Electrical System Error” by opening and replacing two battery modules inside the HV battery. First of all there’s several disclaimers I wanna make.
1. Whatever you do is at your own risk. If you f*** up you could cause a massive fire, could shock yourself to an instant death. I won’t be responsible for anyone’s Darwin Award while trying to fix their Taycan…
2. Related to point one, we are based in Thailand, where we have 50 daily road deaths mostly from motorbike riders who don’t wear helmet at speeds well over 100km. People here think the exact same about PPE, so you will notice my staff are wearing very little PPE. It’s a lost battle for me, they refuse to wear it and I have to constantly be on top of them reminding them every minute…. If you try this repair yourself you should use the appropriate PPE (1kV safety gloves, 1kV safety boots, facial cover) and the appropriate insulated tools (such as VAS6762). This post is about repairing a Taycan battery, not about how to safely handle an HV battery. Don’t be an ass about it.
Well, the first step in this repair is of course diagnosis. Use PIWIS3 or PIWIS4, those “generic tablets” won’t get you far in repairing a Taycan. In this case we got the following error code:
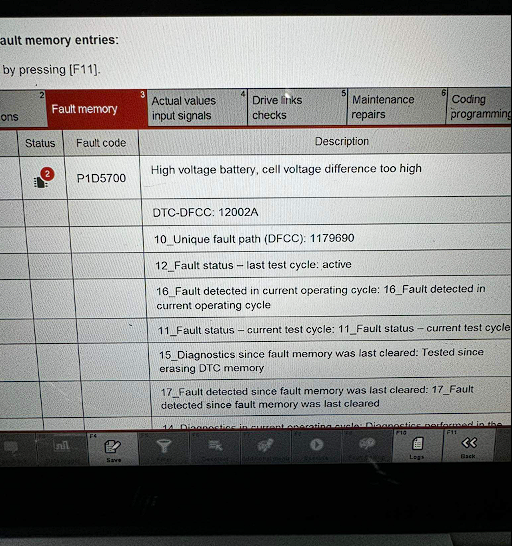
“Cell voltage difference too high” – self explanatory really. Every module inside the battery must be perfectly balanced to the same voltage value up to at least two decimal values with a very minor tolerance margin. The same applies to each pouch cell inside each module.
From the code above we can ascertain at least one cell in at least one module inside the HV battery has passed on to a better life.
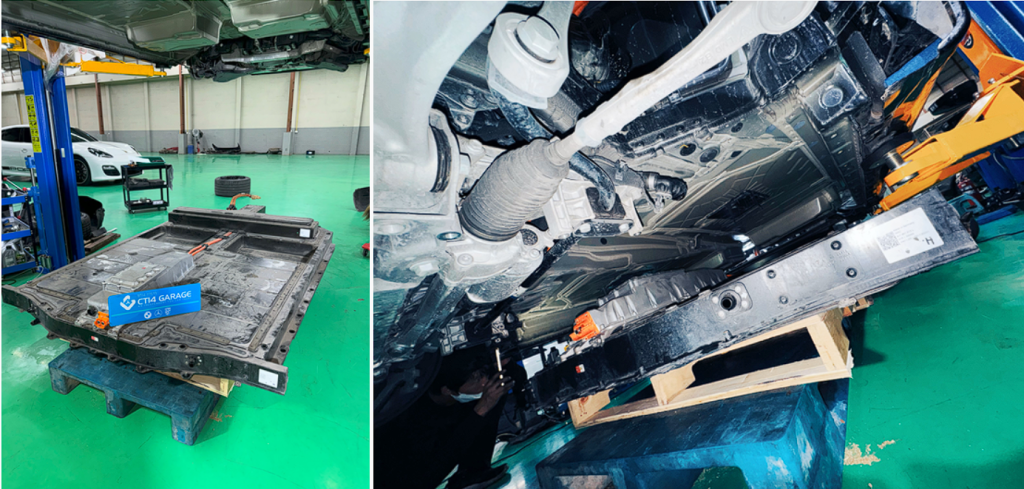
Let’s remove the car’s HV battery from the car. Easy peasy. Follow Porsche’s manual. (It says you need some fancy hydraulic trolley to support the battery – but in reality 4 wood pallets will do). ‘
Step 0: De-energize HV system. Remove all body panels underneath the car.
Step 1: Drain the coolant. Disconnect one hose going to the radiator at the front of the car, disconnect the two hoses going into the HV battery at the front, and then disconnect one hose going to the motor at the rear. Pry the hose lock with a flat screwdriver it will come out.
Step 2: Remove the lining in the trunk, there is a lid which you can open and gives you access to the HV connector for the rear motor. Remove the 3 screws and undo the connector.
Step 3: Undo the HV connector at the front of the battery + 48V connector (pictures attached)

Step 4: Remove all the bolts holding the battery to the frame. Including 4 screws that bolt the battery to the rear subframe (and the earth wire, next to the rear right wheel)
Congratulations, now you got the battery out of the car:
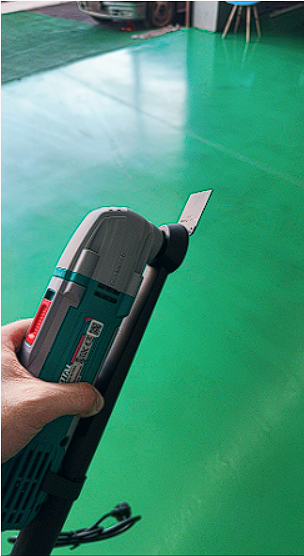
Step 5: Once the battery is out of the car, if it’s a battery plus you will have 3 extra modules on top. Remove the lid for those 3 modules using an oscilating machine like this one (be careful not to go too deep inside the battery). Then pry the lid open, but don’t destroy it. We will be reusing the lids.
Step 6: Remove the nuts for the BMS module and disconnect it, then upon opening the lid for the 3 extra modules, remove all the HV wires connecting the three extra modules to the inside of the battery. Then proceed to remove the modules together with their container structure.
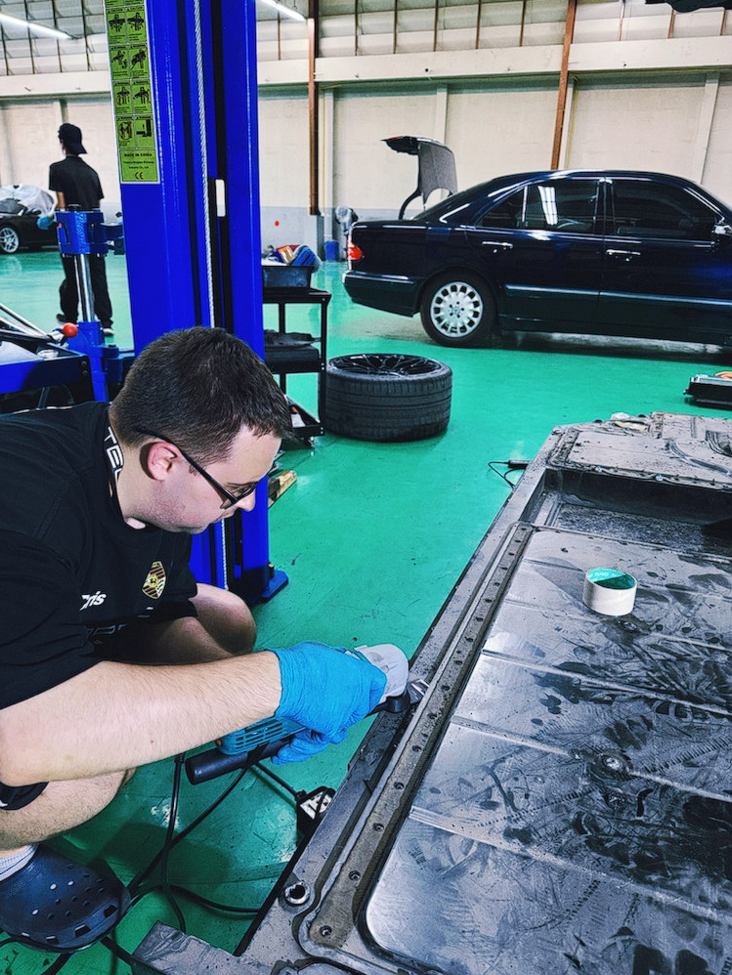
Step 7: Use the oscilator tool to remove the battery’s main lid. It works exactly the same as the lid for the 3 modules on top.
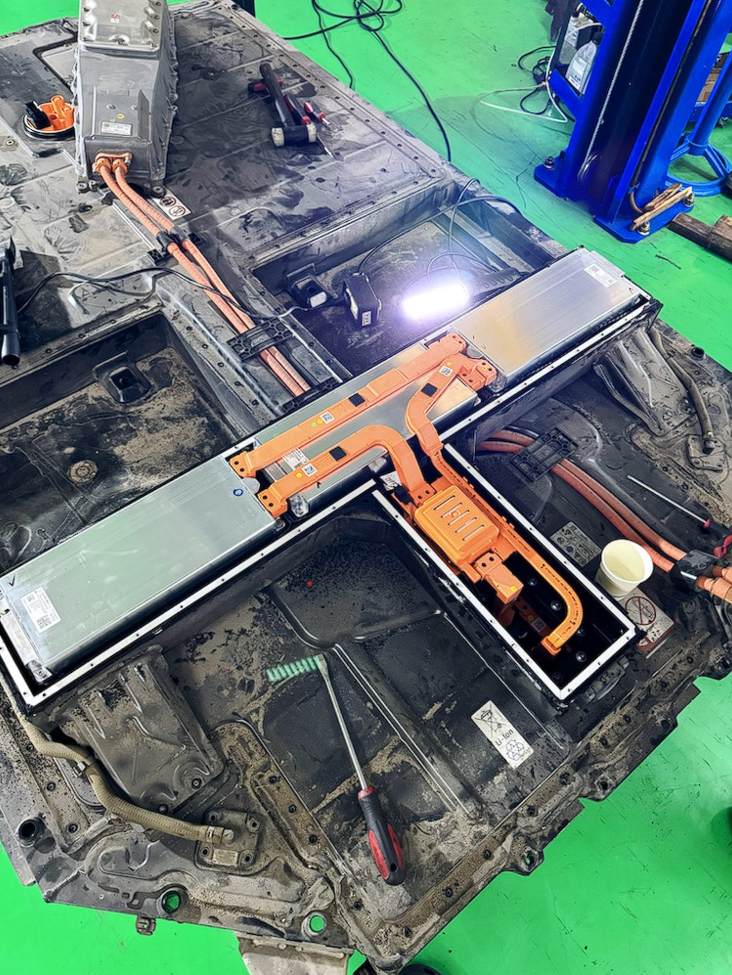
Step 8: Congratulations you’ve opened up the battery.
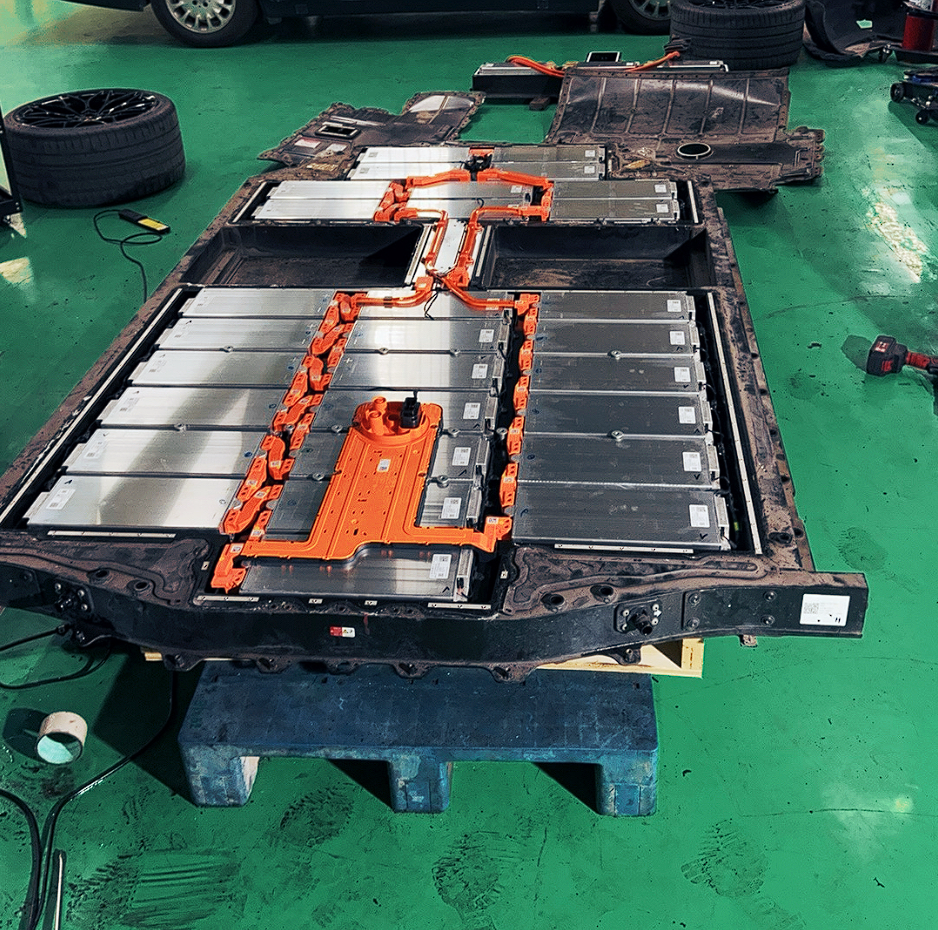
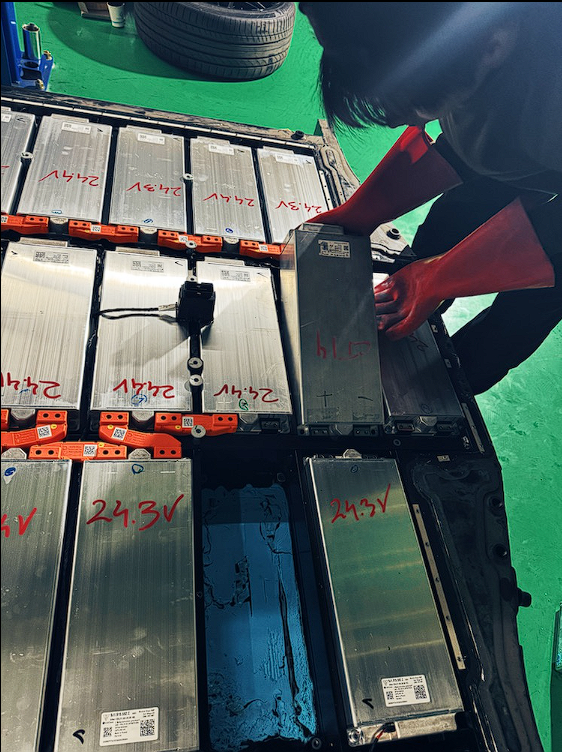
Step 9: Grab yourself a multimeter that can measure at least two decimal places DC voltage up to 40V and measure the voltage of each module independently. Like this:
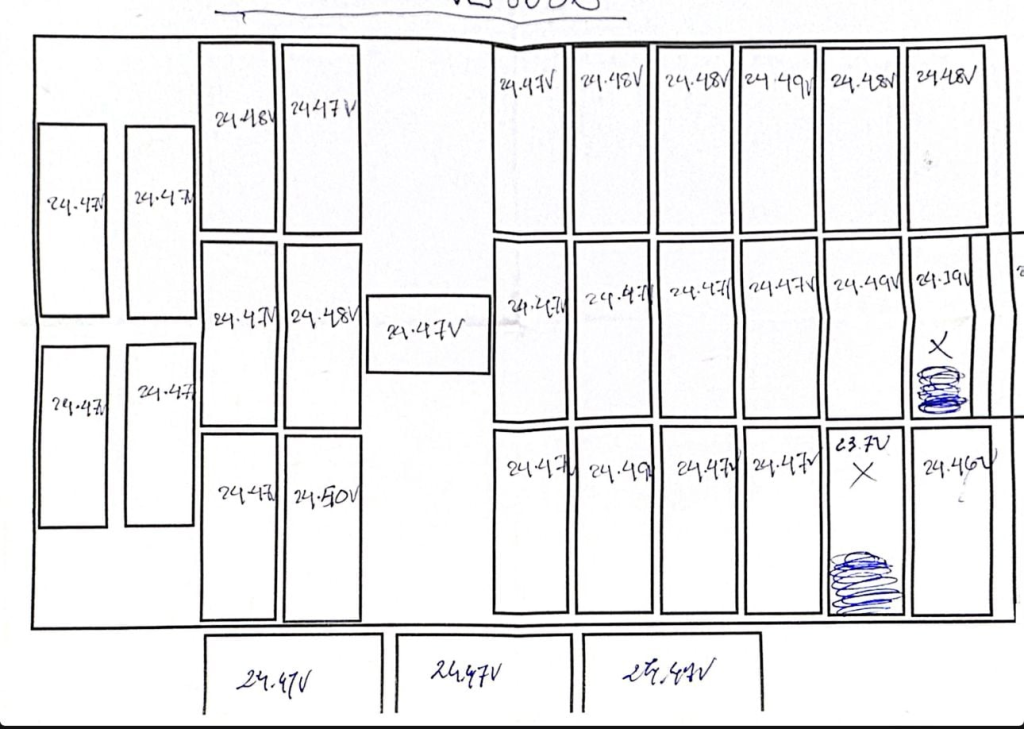
As you can see, all modules in this battery were within the range 24.47V to 24.50V… except for two modules which had dropped to 23.7V and 24.19V respectively. These modules are bad (pouch cells dead inside) and must be replaced.
Grab yourself two replacement modules, balance them to exactly the same voltage as all the others (anything between 24.47V and 24.50V). Put them back on the battery.
Reseal the battery using PU sealant and tightening the screws to the correct torque. After you are done sealing the battery, you must pressure test it to ensure it is airtight using
Repeat everything in reverse to put the battery back in the car. Then use PIWIS3 to code the new module’s Serial Number and then do the procedure to unlock the HV battery. Your Taycan will be fixed